
You can use the web or mobile app to post news and events.
To Publish a Post on the Web:
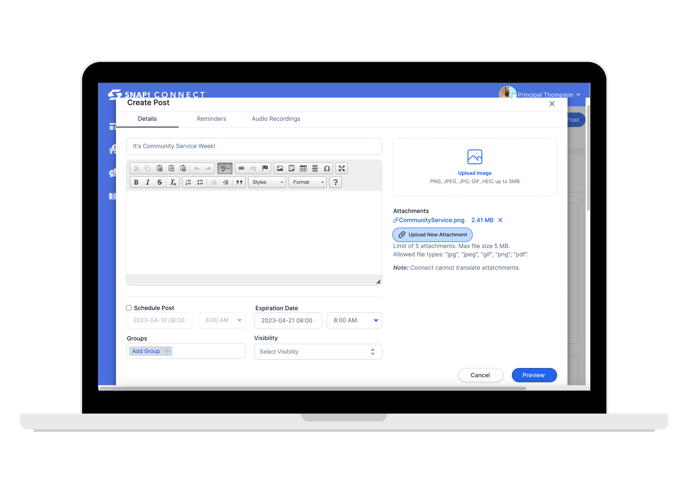
1. From the dashboard, click create post.
or click Posts from the menu bar on the left and click + Create Post.
Determine whether you want to post a news item or an event.
2. Add a title and expiration date to your post. You may also choose to schedule your post to publish at a future date and time. If you do not choose that option, your post will publish immediately. You are strongly encouraged to add an article image. This may be something you download from the internet or upload from your phone.
Please note: Snap! Connect cannot translate any text included in the image.
Optional: You can also add attachments (PDF's and images). These cannot be translated as Snap! Connect does not have access to the content. You may also choose to attach an audio recording. Enter the phone number you’d like the system to call, then record your message over the phone. You can then set these recordings to go to all recipients of your group or a specific language subset.
Events, only:
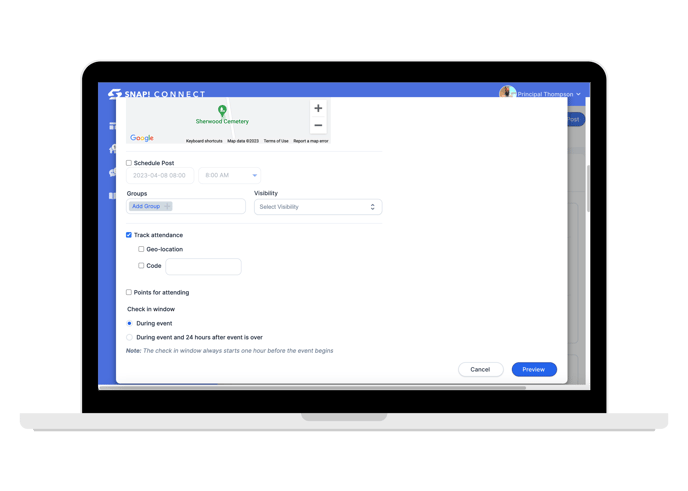
Add a date, time, and physical location for an in-person event or a URL for a virtual event. 
3. Add content to your post. You can add tables, embed videos by pasting a URL, and format the font.
Under Recipients, click "Add Group" and select the checkbox next to the group(s) to whom you would like to publish this post. You can also use the search bar at the top of the pop-up to look for a specific group.
At the bottom of the window, select the roles to which you would like to publish your post from the
Visibility drop-down menu. Select to publish to the guardians of the students in a given group.
You may also choose to add a related reminder to publish at a future date by clicking Reminders at the top of the window.

Additional [optional] Event Features:
- Track Attendance: If you want to track attendance once the event begins, click Track attendance and Geo-location and/or Code. If you choose code, create a code. Geo-location can only be chosen for in-person events. Select if you want the check-in period to be during the event only, or also for the next 24 hours at the bottom of the page.
- Assign Points: Determine if you want to assign points for attending.
4. Preview and publish your post! If you are publishing to a group for which your post needs approval, it will be sent to the members of that group that have the permission to approve a post. They will then be able to return it to you for editing or publish it.
