
If you are an Admin of Campaign or School, you can take full advantage of the free features the Snap! Mobile App has to offer. To use these features, follow the training below to learn how to use the Portal backend system.
Interested in learning more about the locked features in the Portal? Submit a request via the link at the bottom of the page!
- Module 1: Navigating Your FanX Portal
- Module 2: Import New Schedules & Rosters
- Module 3: Manage Teams, Schedules/Scores, & Rosters
- Module 4: Change the Display Order & Organization of the App
- Module 5: Create, Schedule, & Send Notifications
Module 1: Navigating Your FanX Portal
For a step-by-step overview, visit the module: Navigating Your FanX Portal
For an initial video walkthrough of the FanX Portal, please watch:
PW: gY5ne@15
Module 2: Import New Schedules & Rosters
For a step-by-step overview, visit the module: Import New Schedules & Rosters
Start by logging into your portal HERE.
Add a Game
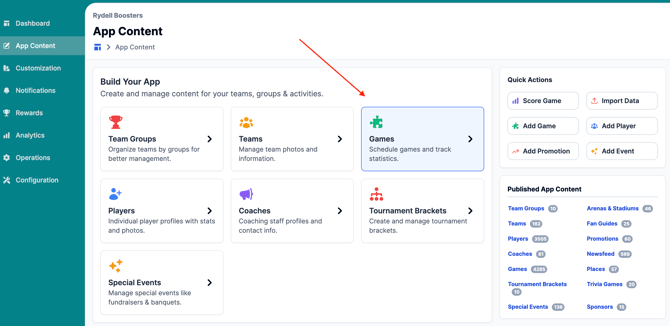
1. Start by visiting the App Content Tab in the left-hand navigation panel to interact with the Games App Content Library.
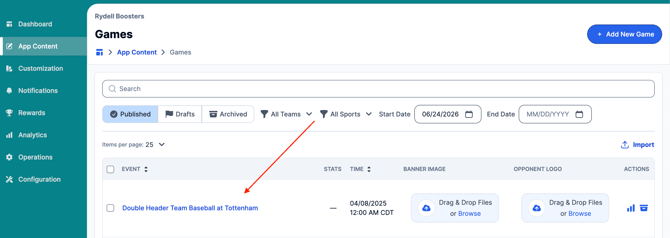
2a. To add an individual game, click the "Add New Game" button at the top right in blue.
2b. To add multiple games via import, click the Import blue text. Imports can be an XML file or an Excel Spreadsheet. If importing, a template will be available for you to use upon clicking the Import button.
Importing
Importing data is a way to get large amounts of content into the app. For instance, if you have already entered all of your athletic events into another system, importing allows you to quickly and painlessly copy that data into the app. Copying the data saves time and reduces the chance of errors.
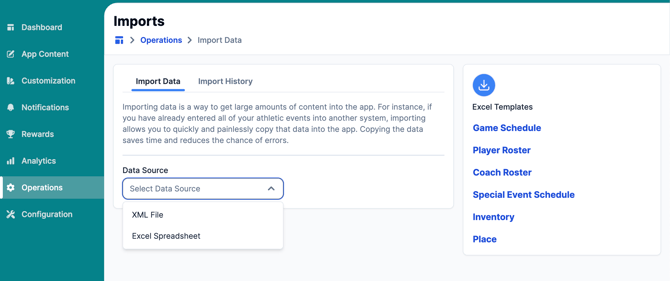
Excel Templates are available:
Game Schedule | Player Roster | Coach Roster | Special Event Schedule | Inventory | Place
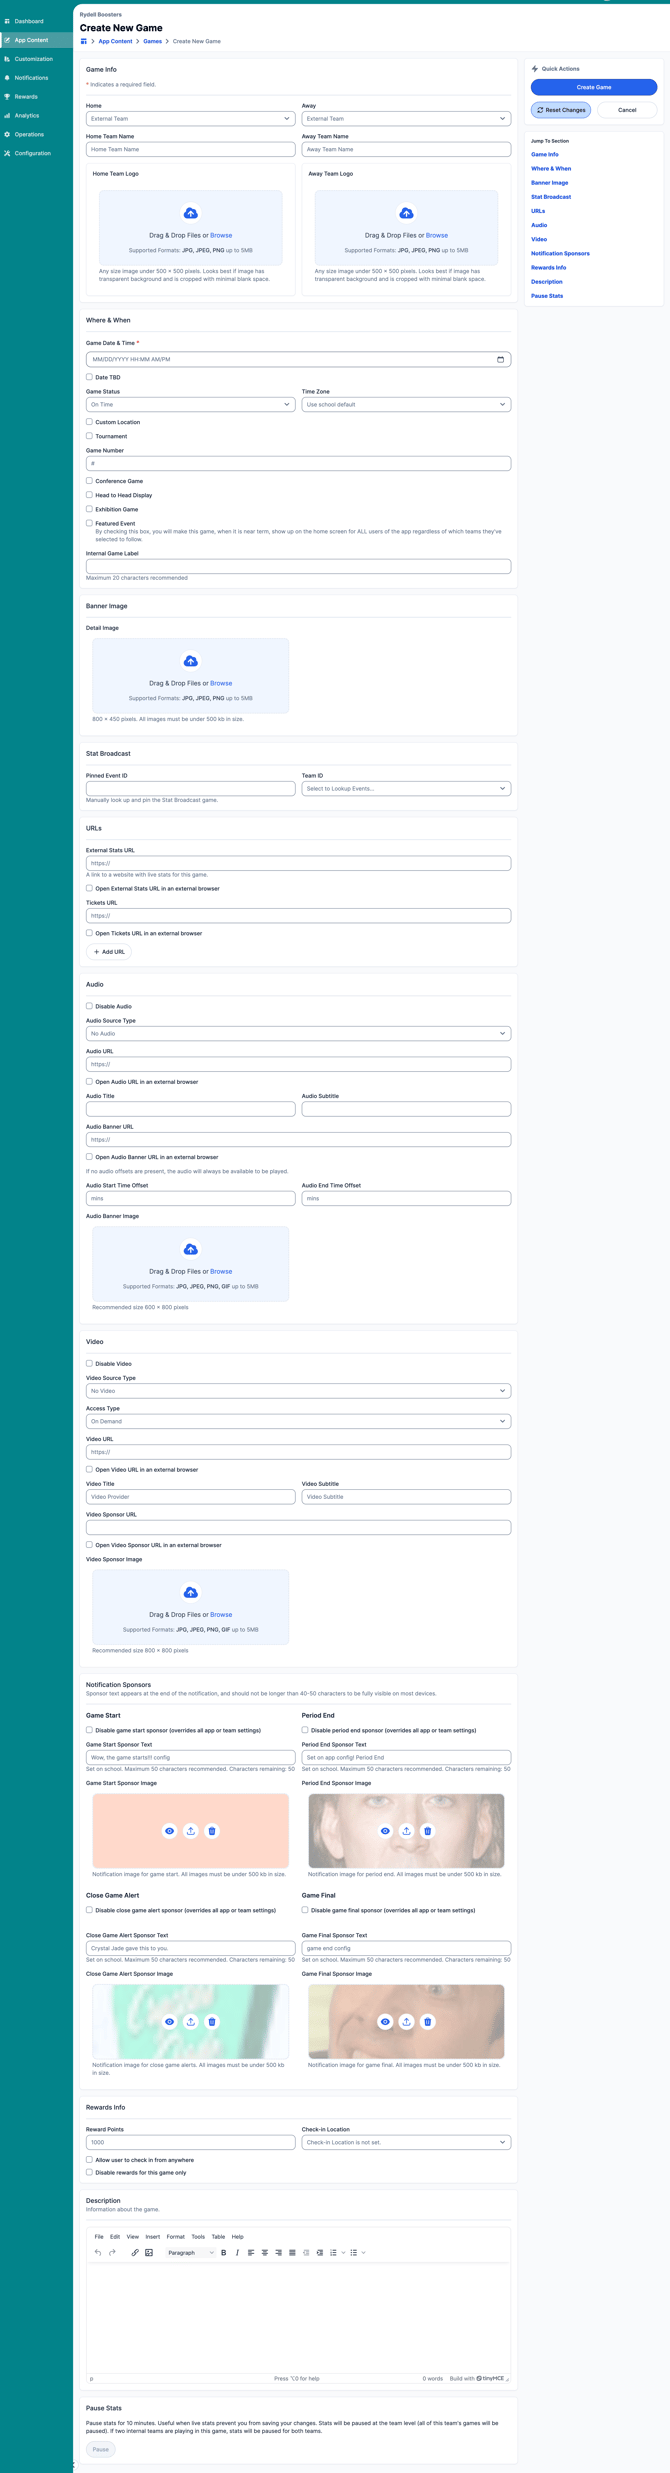
Adding games individually, outside of an import, will include multiple fields of input and customization:
- Game Info
- Where & When
- Banner Image
- Stat Broadcast
- URLs
- Audio
- Video
- Notification Sponsors
- Rewards Info
- Description
- Pause Stats
Adding players directly to the app portal is only needed if you are not utilizing the Snap! Manage platform or another integration that pulls your rosters.
In order to add a player to a roster, start by logging into your portal HERE.
Add a Player Directly to the Team Roster
1. Start by searching for the event from the dashboard or visiting the App Content Tab in the left-hand navigation panel to interact with the Players Library.
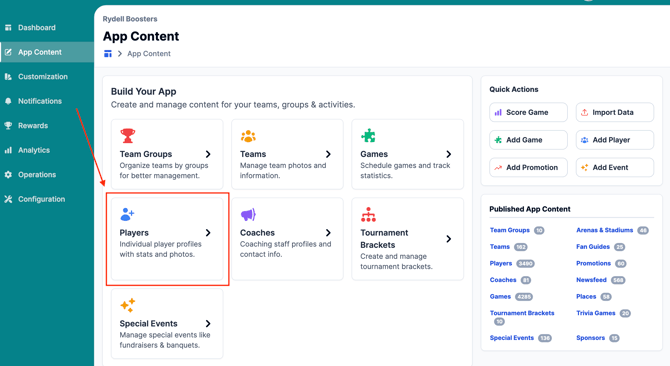
2. The Player List for all teams will pop up. From here, click the "+Add Player" blue button to add one player, or the upload arrow next to it to Import.
-
Imports can be an XML file or an Excel Spreadsheet. If importing, a template will be available for you to use upon clicking the Import button.
-
If adding a player using the "Plus" sign, fill out all required fields and then click "Create Player" to add!
NOTE: If Players need to be added to multiple teams, a new Player will need to be created for each team.
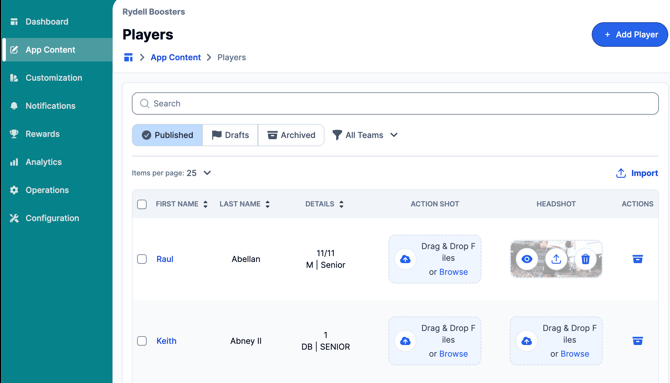
The following fields are required when adding a player:
- Team selection
- First Name & Last Name
*All additional player details can be added during creation, or edited at a later date.

Moving a Player to a Different Roster
If you make a mistake or need to move a player to a different roster, follow these steps:
1. Click on the Player from the Players list you would like to update to a roster to.
2. Click Edit Player in the Quick Actions section on the right side of the page.
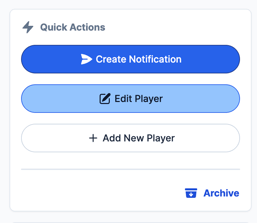
3. Edit the player details to select the new team via the team drop down section.
5. Click Save Player once finished!
Module 3: Manage Teams, Schedules/Scores, & Rosters
For a step-by-step overview of Schedules & Rosters, visit the module: Import New Schedules & Rosters
For Viewing Team Management and Event Management + Scores, visit the module: Manage Teams, Schedules/Scores, & Rosters
FOR WEBSITE INTEGRATIONS:
Most of the content for teams, events, and scores will be automatically updated as long as the website we are integrating with is up-to-date. We recommend continuing this training in case you ever need to make a last minute or emergency update to a game or team.
NOTE: Depending on your website provider, updates may take 30 minutes or longer. Updates on the Portal, once saved, will update right away, ready for the next time you open the app!
For Rosters, please view the overview in Module 2 above.
Module 4: Change the Display Order & Organization of the App
For a step-by-step overview, visit the module: Change the Display Order & Organization of the App
For Tier 2 and Tier 3 users only.
In order to reorder your home screen cards, start by logging into your portal HERE.
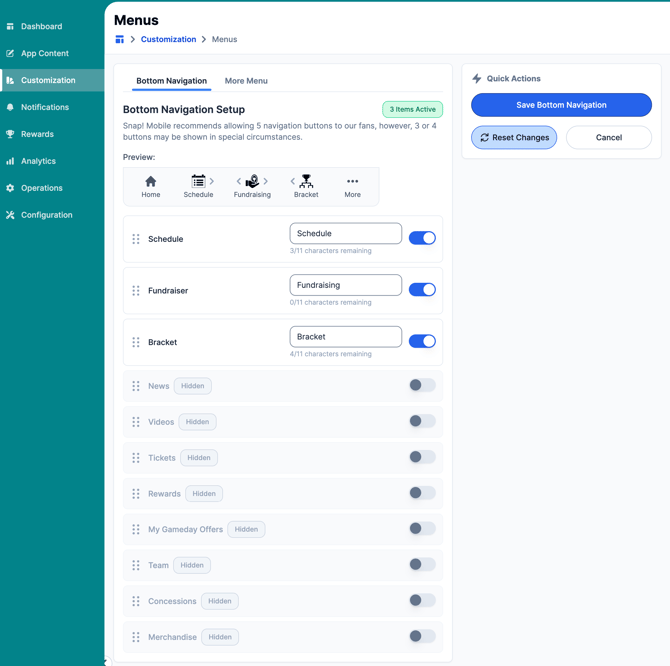
You can reorder your home screen cards at any time by visiting the Customization tab in the left-hand navigation panel to interact with the Menus Library.
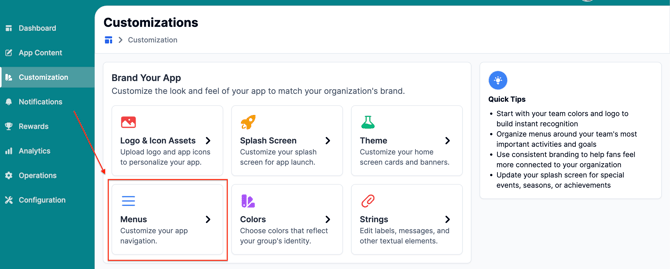
You can change your home screen cards by simply dragging and dropping them in the order you prefer. Be sure to save your changes once you're finished!
A Few More Tips
- Clicking the eye icon will disable the card and hide it from view in the app.
- You can also rename a small number of cards by scrolling down on this page. The cards that can be edited will display a “Card Title” section, in which you can rename them.
- Need to create new card images? Check your Marketing Kit to see if one is already available. If you need a brand new image, please contact your Customer Success Manager for assistance. Marketing kits can be found by visiting Configuration >
App Resources.
Module 5: Create, Schedule, & Send Notifications
Send a Notification
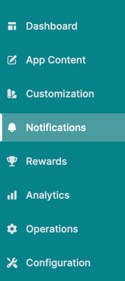
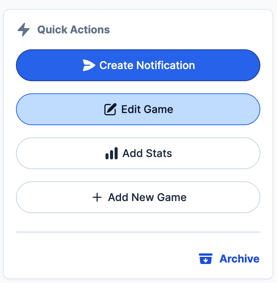
1. You can also send a notification letting fans know about your games or events. To do this, either navigate to the Notifications tab via the left-hand menu, or select the Create Notification button in Quick Actions when you are in a game or activity.
2. This will open the notification page where you can add information regarding the cancellation as well as schedule the notification if you would like it to go out at a certain time.
You can then further customize who the notification is sent to by affiliation ie. Fan, Alumni, etc. You can also include an image or URL along with the notification, although this is not as common.
If you wish to send the notification to users who follow a specific team or sport, you can do so by selecting them directly from the audience section.
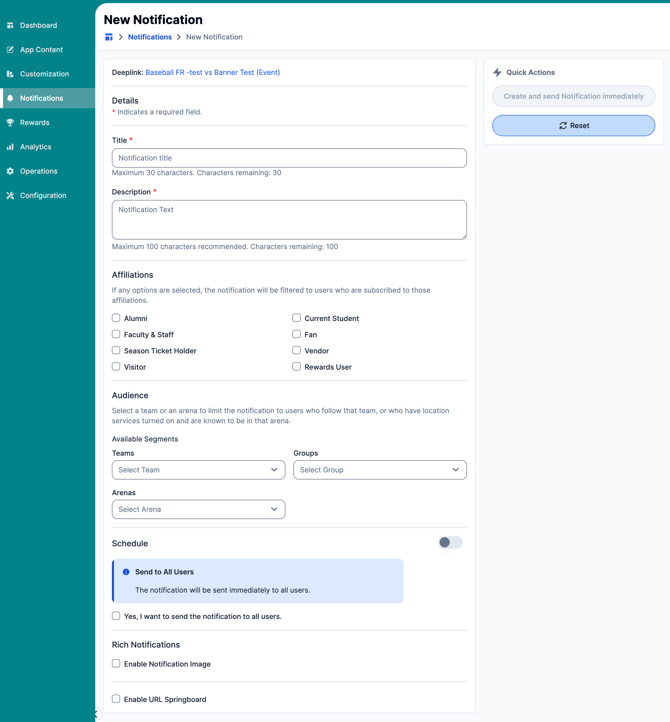
Additionally, you can send your notification only to users within the Geofence of your arena.
Tip: This isn't typically recommended because some users choose not to allow their Location Settings to be tied to the app at all times, and games are often canceled before attendance.
8. Once you are done customizing your notification, select 'Create and Send Notification' in the quick actions menu to the left of the template.
If you are interested in discovering more Snap! Mobile products or getting a customized FanX app for your school or organization, use this form to let us know you are interested! Our team would love to get to know you and your school/organization as Snap! Mobile has many products to help your Admin thrive and keep your community engaged!